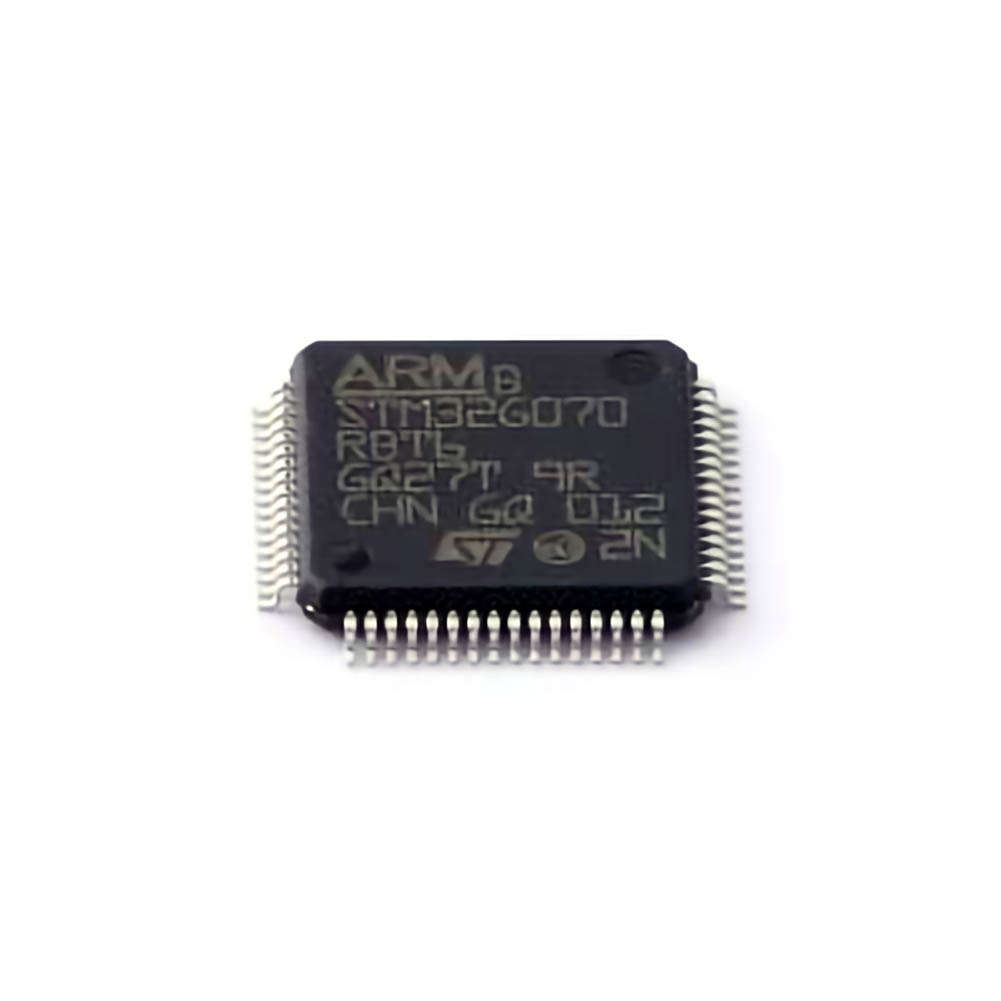
The STM32G070RBT6 microcontroller, a member of the STM32 family, is widely used in embedded systems for its performance, versatility, and low Power consumption. However, like all advanced technology, it can pose challenges during development. This article provides an in-depth guide to common troubleshooting problems and solutions when working with the STM32G070RBT6, offering practical advice to developers and engineers.
Understanding the STM32G070RBT6 and Common Issues
The STM32G070RBT6 is a highly efficient, low-power microcontroller designed by STMicroelectronics. It’s a 32-bit ARM Cortex-M0 based device, featuring a rich set of peripherals, extensive I/O options, and various Communication interface s. It is a popular choice in applications like industrial control systems, automotive, and consumer electronics. Despite its reliability and performance, developers sometimes encounter issues when working with this microcontroller. In this part of the article, we’ll discuss some common problems, their causes, and initial troubleshooting tips.
1. Power Supply Issues
Power supply problems are one of the most frequent causes of system failures. The STM32G070RBT6 requires a stable power source for proper operation. If there’s an issue with voltage levels or current fluctuations, the microcontroller might behave erratically or fail to boot altogether.
Common Symptoms:
The device fails to start.
Unexpected resets or lock-ups.
Erratic behavior, such as incorrect readings from sensors.
Troubleshooting Steps:
Check Power Source: Ensure that the power supply voltage is within the required range, typically 3.0V to 3.6V for the STM32G070RBT6. Use an oscilloscope to verify that there are no significant voltage fluctuations.
Monitor Current Consumption: Use a current probe to monitor the current draw. If the current is too high or too low, it might point to a problem with the power supply or a component drawing excessive current.
Power-On Reset Circuit: Verify that the power-on reset circuit is working properly. The STM32G070RBT6 has an internal reset circuit, but if external components are involved, like capacitor s or resistors, make sure they are functioning correctly.
2. Clock Configuration Issues
The STM32G070RBT6 microcontroller offers multiple clock sources, including an internal high-speed oscillator (HSI), an external crystal oscillator (HSE), and an internal low-speed oscillator (LSI). Incorrect clock settings can lead to various issues, such as Timing mismatches, unreliable communication, and system crashes.
Common Symptoms:
System clock running slower or faster than expected.
Communication interfaces like UART, SPI, or I2C malfunctioning.
Unexpected behavior in time-dependent applications.
Troubleshooting Steps:
Check Clock Source Configuration: Review the configuration of the clock tree in the STM32CubeMX tool or in the code. Ensure that the correct clock source is selected and that any external crystal or oscillator is properly connected.
Verify PLL Settings: The STM32G070RBT6 allows you to use the Phase-Locked Loop (PLL) to increase the system clock. If misconfigured, the PLL can cause the system to run at an incorrect frequency. Double-check PLL settings in the code or configuration files.
Use a Debugger: A debugger can be used to check the clock frequencies at various points in the system. This can help pinpoint any discrepancies and ensure that the system clock is running as intended.
3. Firmware or Bootloader Corruption
Firmware corruption is another common issue that can prevent the STM32G070RBT6 from booting or running correctly. If the firmware is not correctly programmed into the microcontroller or if the bootloader is corrupted, the microcontroller may not start at all or may behave erratically.
Common Symptoms:
The system does not boot.
The microcontroller enters a fault condition and continuously resets.
Unreliable execution of code.
Troubleshooting Steps:
Reprogram the Microcontroller: If you suspect firmware corruption, try reprogramming the microcontroller using a reliable programmer/debugger such as the ST-Link or J-Link.
Check Bootloader Settings: The STM32G070RBT6 has built-in bootloader functionality, which can be used to load firmware over various communication interfaces, such as UART, USB, or SPI. If the bootloader is corrupted, you might need to use the SWD interface to recover the device.
Perform a System Reset: Use the reset pin or watchdog timer to force a full system reset, which can sometimes clear any faults caused by corrupted firmware.
4. Debugging Communication Interfaces
Communication problems are common in embedded systems that involve interfaces like UART, SPI, or I2C. These interfaces are often crucial for peripheral communication, and any failure can lead to a malfunctioning system.
Common Symptoms:
Data corruption or loss.
Inability to communicate with peripherals.
Unexpected data behavior.
Troubleshooting Steps:
Check Wiring and Connections: Ensure that all wires are connected properly, especially for SPI and I2C, where incorrect wiring or poor connections can cause data transmission issues.
Verify Baud Rates and Timing: For UART and SPI, ensure that the baud rate and clock settings are properly configured. Mismatched settings between the microcontroller and the peripheral can lead to communication errors.
Use Logic Analyzer: A logic analyzer is an excellent tool for inspecting the signals on communication lines. It allows you to see if the data packets are being transmitted and received correctly and helps identify timing issues.
5. Memory Issues
The STM32G070RBT6 microcontroller features Flash memory and SRAM, which are critical for storing code and data. Problems with these memory types can lead to unexpected resets, data corruption, and failure to run the program.
Common Symptoms:
Program fails to load or run.
Memory read/write errors.
System crashes or resets during memory access.
Troubleshooting Steps:
Verify Flash Programming: Use the STM32CubeProgrammer or other reliable tools to check the content of the Flash memory. If the memory is corrupted, reflash the device with the correct firmware.
Check SRAM Usage: Verify that your code isn’t exceeding the available SRAM. Use the linker script to ensure proper memory allocation and avoid overwriting critical areas of memory.
Perform Memory Test: Implement simple memory test routines to verify that the SRAM and Flash memory are functioning correctly.
Advanced Troubleshooting and Solutions for STM32G070RBT6
While the first part covered common troubleshooting techniques for the STM32G070RBT6, part two delves deeper into advanced issues that might arise during the development process. These include handling peripheral failures, optimizing power consumption, and dealing with advanced debugging techniques.
6. Peripheral Initialization Failures
The STM32G070RBT6 comes equipped with a variety of peripherals such as ADCs, timers, and digital I/O pins. Incorrect initialization of these peripherals can lead to malfunctions in their respective operations.
Common Symptoms:
Analog-to-digital conversions produce incorrect results.
Timers do not trigger at the correct intervals.
Digital I/O pins do not work as expected.
Troubleshooting Steps:
Check Peripheral Initialization Code: Review the initialization code for the peripherals in question. Ensure that all configuration registers are set correctly, including clock gating for peripherals.
Use STM32CubeMX: This tool can automatically generate peripheral initialization code, which can be a good reference point. Cross-reference your manual code with the generated code to identify discrepancies.
Test Peripherals Individually: If possible, isolate and test each peripheral in a simple setup to rule out other system issues.
7. Low Power Mode Troubleshooting
The STM32G070RBT6 is designed to operate in low-power modes, which is ideal for battery-operated or energy-constrained applications. However, misconfigurations in these modes can cause unexpected behavior, such as the microcontroller not waking up as expected or drawing more power than necessary.
Common Symptoms:
System fails to wake up from sleep or standby mode.
Excessive current consumption during low-power operation.
Troubleshooting Steps:
Check Sleep Mode Configuration: Review the code that handles sleep and standby modes. Ensure that interrupts and wake-up sources are configured correctly to bring the system out of low-power states.
Monitor Power Consumption: Use an ammeter or dedicated power measurement tool to track current consumption during low-power operation. This can help you identify excessive current draw that could indicate improper configuration.
Use Debugging Features: Many STM32 devices, including the G070RBT6, support the use of debugging features like the Low Power Debug mode, which allows you to observe the state of the microcontroller during low-power modes.
8. Advanced Debugging Techniques
Debugging embedded systems can be challenging, but STM32 microcontrollers offer a range of advanced debugging features that can significantly simplify the process. The STM32G070RBT6 supports tools like SWD (Serial Wire Debug) and JTAG, which allow you to step through code, inspect variables, and set breakpoints.
Common Symptoms:
Inability to step through code or inspect variables.
Unresponsive system during debugging sessions.
Problems with breakpoints or watchpoints.
Troubleshooting Steps:
Ensure Debugging Interface is Enabled: Double-check that the SWD or JTAG interface is enabled in the microcontroller’s configuration. Ensure that the necessary pins (SWDIO, SWCLK) are correctly connected to the debugger.
Use the STM32CubeIDE: This integrated development environment is optimized for STM32 microcontrollers and provides robust debugging features. Make sure that the firmware is compiled with debugging symbols enabled to allow proper inspection during debugging.
Use Breakpoints Wisely: Set breakpoints at critical points in the program, particularly where issues have been identified. This can help isolate the root cause of the problem.
9. Handling External Interrupts and Exceptions
Interrupts are vital for real-time processing, but if an external interrupt or exception is not handled correctly, it can disrupt the system’s behavior.
Common Symptoms:
Interrupts are not triggered or handled properly.
System crashes due to unhandled exceptions.
Troubleshooting Steps:
Verify Interrupt Vector Table: Ensure that the interrupt vector table is properly initialized, and each interrupt handler is correctly linked to its respective interrupt source.
Check Priority Levels: STM32 microcontrollers allow you to configure the priority of interrupts. Make sure that the priority levels are set correctly, and no higher-priority interrupt is inadvertently blocking lower-priority interrupts.
Enable Exception Handlers: If an exception occurs, make sure that the system enters the exception handler and logs or reacts to the issue appropriately.
With the steps outlined in both parts of this article, developers and engineers can effectively troubleshoot and resolve common and advanced issues encountered while working with the STM32G070RBT6 microcontroller. By understanding the system’s intricacies and employing a structured approach to debugging, you can ensure optimal performance for your embedded system projects.
If you’re looking for models of commonly used electronic components or more information about STM32G070RBT6 datasheets, compile all your procurement and CAD information in one place.
( Partnering with an electronic component supplier) sets your team up for success, ensuring that the design, production and procurement processes are streamlined and error-free. (Contact us) for free today.

